Kai's Soccer Ball Birthday Cake
 Its time for another cake! I still owe this blog one entry on a baby shower cake we did in September. I don't have any pictures of it in part because the shower was at 4pm on the day that Michigan played Notre Dame at 3:30pm. So I was mainly concerned with getting the cake out of the house so I could watch football. Pictures were taken, but I don't have them yet.
 Here are the two halves of the soccer ball. Rice Krispy Treats were the base and a funfetti cake on the top. Both halves were formed using a soccer ball cake by Wilton.
 We used buttercream to stick the two halves together, then draped it in white fondant.
 Once the fondant was down Lauren lightly pressed the lines for the paneling and then used her stitching tool to complete the look.
 This was our original idea for the cake, but there was no good way to cover the 1 in a solid color. Fondant would have left ugly seams all over the place and nothing else would have been as smooth as fondant. I am sure we could have figured something out eventually, but we ended up abandoning the #1 in favor of a Happy Birthday placard.
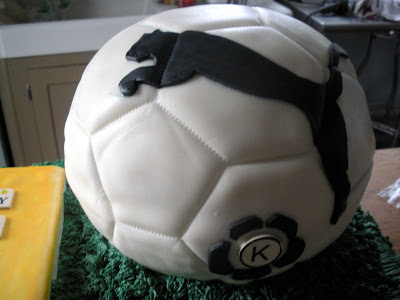
 The birthday boy and his cake.
From left to right: Kyle, Tricia, Lauren and I posing with the cake. You might notice the section of mostly missing cake to the right of the soccer ball. That plus most of the unseen back cake half of the soccer ball managed to feed everyone at the party. Lauren and I kind of eyeballed how much cake we needed. 13 x 9 seemed small, especially given the size of the soccer ball. So we got a 12" x 18" pan, but when we baked the first layer it seemed really thin. So we decided three layers would be better than two. It was only time constraints that stopped it from being 4 layers. Of course when we stacked it up the cake ended up being enormous. A catering website I looked up after the fact informed us that a 2 layer 12" x 18"cake serves 54 dessert sized portions. So I'm thinking this cake served roughly 81 from the bottom cake alone, plus another 10 or so out of the soccer ball.
Chicken, Pesto & Sun-Dried Tomato Pizza
 This recipe ought to look familiar. Its essentially the same as the Margherita Pizza, with the obvious changes with the toppings and the use of bread flour instead of all purpose flour. The flour change wasn't special to this pizza, I just happened to be out of flour and decided I'd give the bread flour a shot since its higher gluten content is supposed to create a chewier crust.
Chicken, Pesto, Sun-Dried Tomato Pizza:
- 1/4 cup pesto + 1 clove minced garlic (or to taste)
- 1-2 cups mozzarella cheese
- 1 lb diced, cooked chicken
- 1 pkg sun-dried tomatoes
- Shredded parmesan (optional)
- Feta cheese crumbles(optional)
- Preheat the oven with your pizza stone/baking sheet inside to 500 degrees.
- Cook your chicken. I typically dice it raw, marinate it in Italian dressing for 5 mins then saute it until cooked through (5 mins). If not that I'll use 1/4 - 1/2 cup chicken broth and poach the diced chicken and season it will salt & pepper. Either way make sure to strain or pat your chicken dry with paper towel before putting it on your pizza.
- .25 oz. pkt. active dry yeast
- 1/4 tsp. granulated sugar
- 3/4 cup warm (105-115 degrees) water, temperature measured with a thermometer
- 1 3/4 cups bread flour (AP works too, but bread flour tastes better)
- 1/2 tsp. salt
At this point you can either let the dough rise for 1-2 hours for a normal pizza crust or you can use it immediately for a thin crust pizza.
Turn dough onto a floured surface and knead by hand for 2 minutes. Stretch or roll your dough into a 12" or 14" circle on a flour, parchment or corn meal covered surface. Brush the top surface of the dough with olive oil.
 Remove your preheated pizza stone or baking sheet from the oven.Transfer your dough to the baking sheet/pizza stone, and quickly spread your pesto. Add your 1-2 cups of mozzarella cheese and top with the chicken and sun-dried tomatoes.
- Sprinkle feta and/or parmesan cheese (optional).
- Bake at 500 for 8-10 minutes. Let cool 2-5 minutes. Enjoy.
Margherita Pizza
 Okay, its been a long, long time since I've posted anything here. I am back in school full time this semester and working when I don't have class, so that doesn't really leave me much time to throw caution to the wind and tackle new recipes consistently enough to entertain the people that may or may not read this blog.
- 2 tablespoons extra virgin olive oil
- 1/2 lb. Roma tomatoes, chopped
- 1 clove garlic, crushed and finely chopped
- 1/2 tsp. salt
- 1/8 tsp. pepper (or to taste)
- 6 oz. (1.5 cups) mozzarella cheese, shredded
- 6 fresh basil leaves
- Extra virgin olive oil
- 1/4 cup fresh shredded parmesan cheese
- Preheat the oven with your pizza stone/baking sheet inside to 500 degrees.
- Combine 2 tablespoons olive oil, chopped tomatoes, garlic, salt and pepper in a bowl.
- .25 oz. pkt. active dry yeast
- 1/4 tsp. granulated sugar
- 3/4 cup warm (105-115 degrees) water, temperature measured with a thermometer
- 1 3/4 cups all-purpose flour
- 1/2 tsp. salt
- Remove your preheated pizza stone or baking sheet from the oven .
- Transfer your dough to the baking sheet/pizza stone, and quickly add your 1.5 cups of mozzarella cheese and top with the chopped tomatoes.
- Drizzle lightly with olive oil and stick the baking sheet/pizza stone back in the oven for 8-10 minutes.
- Top with basil and parmesan (if you want), let the pizza cool for 2-5 minutes and enjoy.
Madeira Cake w/ Strawberry Chocolate Ganache
 As part of expanding our (her) cake repetoire, Lauren and I have sort of committed to abandoning boxed cake mixes and using straight from scratch recipes. With the assistance of a cake decorating book that Rachel got for us, we took our first step in that direction last night. I don't have recipes for this entry because I don't have the book in front of me, and on top of that I didn't actually do any of the baking last night because I was busy doing the cooking (chicken salad and potato salad) and the dish washing so we didn't get in each other's way.What Lauren made was a Madeira cake filled with strawberries and chocolate ganache and covered with buttercream icing. No fondant this time around. The results were mixed. First off our biggest problem is that we aren't cooking by weight. So next on our list of ways to expand our culinary arsenal is a digital weight scale. Its way too much of a hassle to try to figure how many cups or tablespoons 310 grams of butter is, and if that number of cups/tbsp is the same for 310 grams of sugar (which it isn't).


The Lady & Sons Restaurant
 I just realized I never actually posted anything about our vacation. The vacation was great, and I'll return to share some words and pictures about crabbing and fresh seafood. But I'm going to use this post to focus on Savannah, Georgia and our trip to The Lady & Sons restaurant, owned by Paula Deen of the Food Network.

Salley's Birthday Cake
 Last week while on vacation, Lauren and her sister decided to make a fondant cake for their younger sister's birthday. I thought it was borderline insanity given that we were out of Lauren's kitchen, without any of her cake supplies and most importantly without a KitchenAid stand mixer. Bu they were determined to make it happen, so I looked up the fondant recipe, gave them a few pointers and then backed away slowly. Obviously the picture shows that it turned out just fine and here is why: the fondant recipe I was using worked, but it didn't create the most workable fondant.
- 1 - 16oz pkg mini-marshmallows
- 3 tbsp water
- 1 tbsp vanilla
6-8 cups3-4 cups powdered sugar- Vegetable shortening (for greasing everything that touches liquid marshmallow)
In other news, Lauren and I may be making a cake this weekend. Rachel dropped off an incredibly awesome and generous thank you gift to us for Sofia's Dr. Seuss cake. The gifts included a variety of cake decorating and fondant working tools. Lauren will be making a baby shower cake in September and wants to test out some ideas we've seen on Cake Boss and Food Network Challenge. On top of that we've also been contacted by an acquaintance of mine about doing a John Deere tractor wedding cake for August of 2010.
So in short order we're going to need to find some solid "from scratch" cake recipes and start fancying up the actual cake and frosting.
Black Magic Cupcakes
 Lauren made these last night as a peace offering for her coworkers. We're leaving Saturday morning for Charleston SC. We'll be gone for a week and from what I gather her vacation might hamstring a few people at work. Our agenda on vacation should provide for several food related post when we return:
Macaroni & Cheese Bake
 I haven't had macaroni and cheese in a while, so I decided to make some last night. I wanted to take another run at a baked mac and cheese because our previous attempt turned into an egg souffle. I'll never understand what Delia was thinking in the Mac & Cheese throwdown. 12 eggs? Ridiculous.
- 1/2 pound elbow macaroni
- 3 tablespoons butter
- 3 tablespoons flour
- 1 tablespoon powdered mustard
- 3 cups milk
- 1/2 cup yellow onion, finely diced
- 1 bay leaf
- 1/2 teaspoon paprika
- 1 large egg
- 12 ounces sharp cheddar, shredded
- 1 teaspoon kosher salt
- Fresh black pepper
- 3 tablespoons butter
- 1 cup panko bread crumbs
- 1/2 cup diced red bell pepper
- 1/2 cup corn
- 1/2 cup peas

Grilled Chicken Wings
 Friday night I drew some food inspiration from FoodNetwork.com and a food blog linked to the profile of person on a message board. I wanted something quick and simple, with little or no mess which usually means grilled something or other. The first recipe was Bobby Flay's Grilled Chicken Wings. I'm not going to bother pasting the recipe here because in reality I only followed the cooking instructions. I'm sure the sauces were amazing, but I didn't want to end up with 2 pints of greek yogurt blue cheese dipping sauce in the refrigerator.
Wine Tasting In Northern Michigan
 Last Saturday (July 4th) while we were staying in Northport, Lauren and I drove around to some of the local wineries. Leelanau Peninsula is very proud of their wine and a few of the wineries like to point out that they're located along the 45th parallel (north), which is the same parallel as some of the finest wine producing regions of Italy and France. Presumably that implies that they have the ability to grow the same grapes as those regions and thus produce comparable wines. I think there is more to it than that but its not like I would know the differene one way or another.

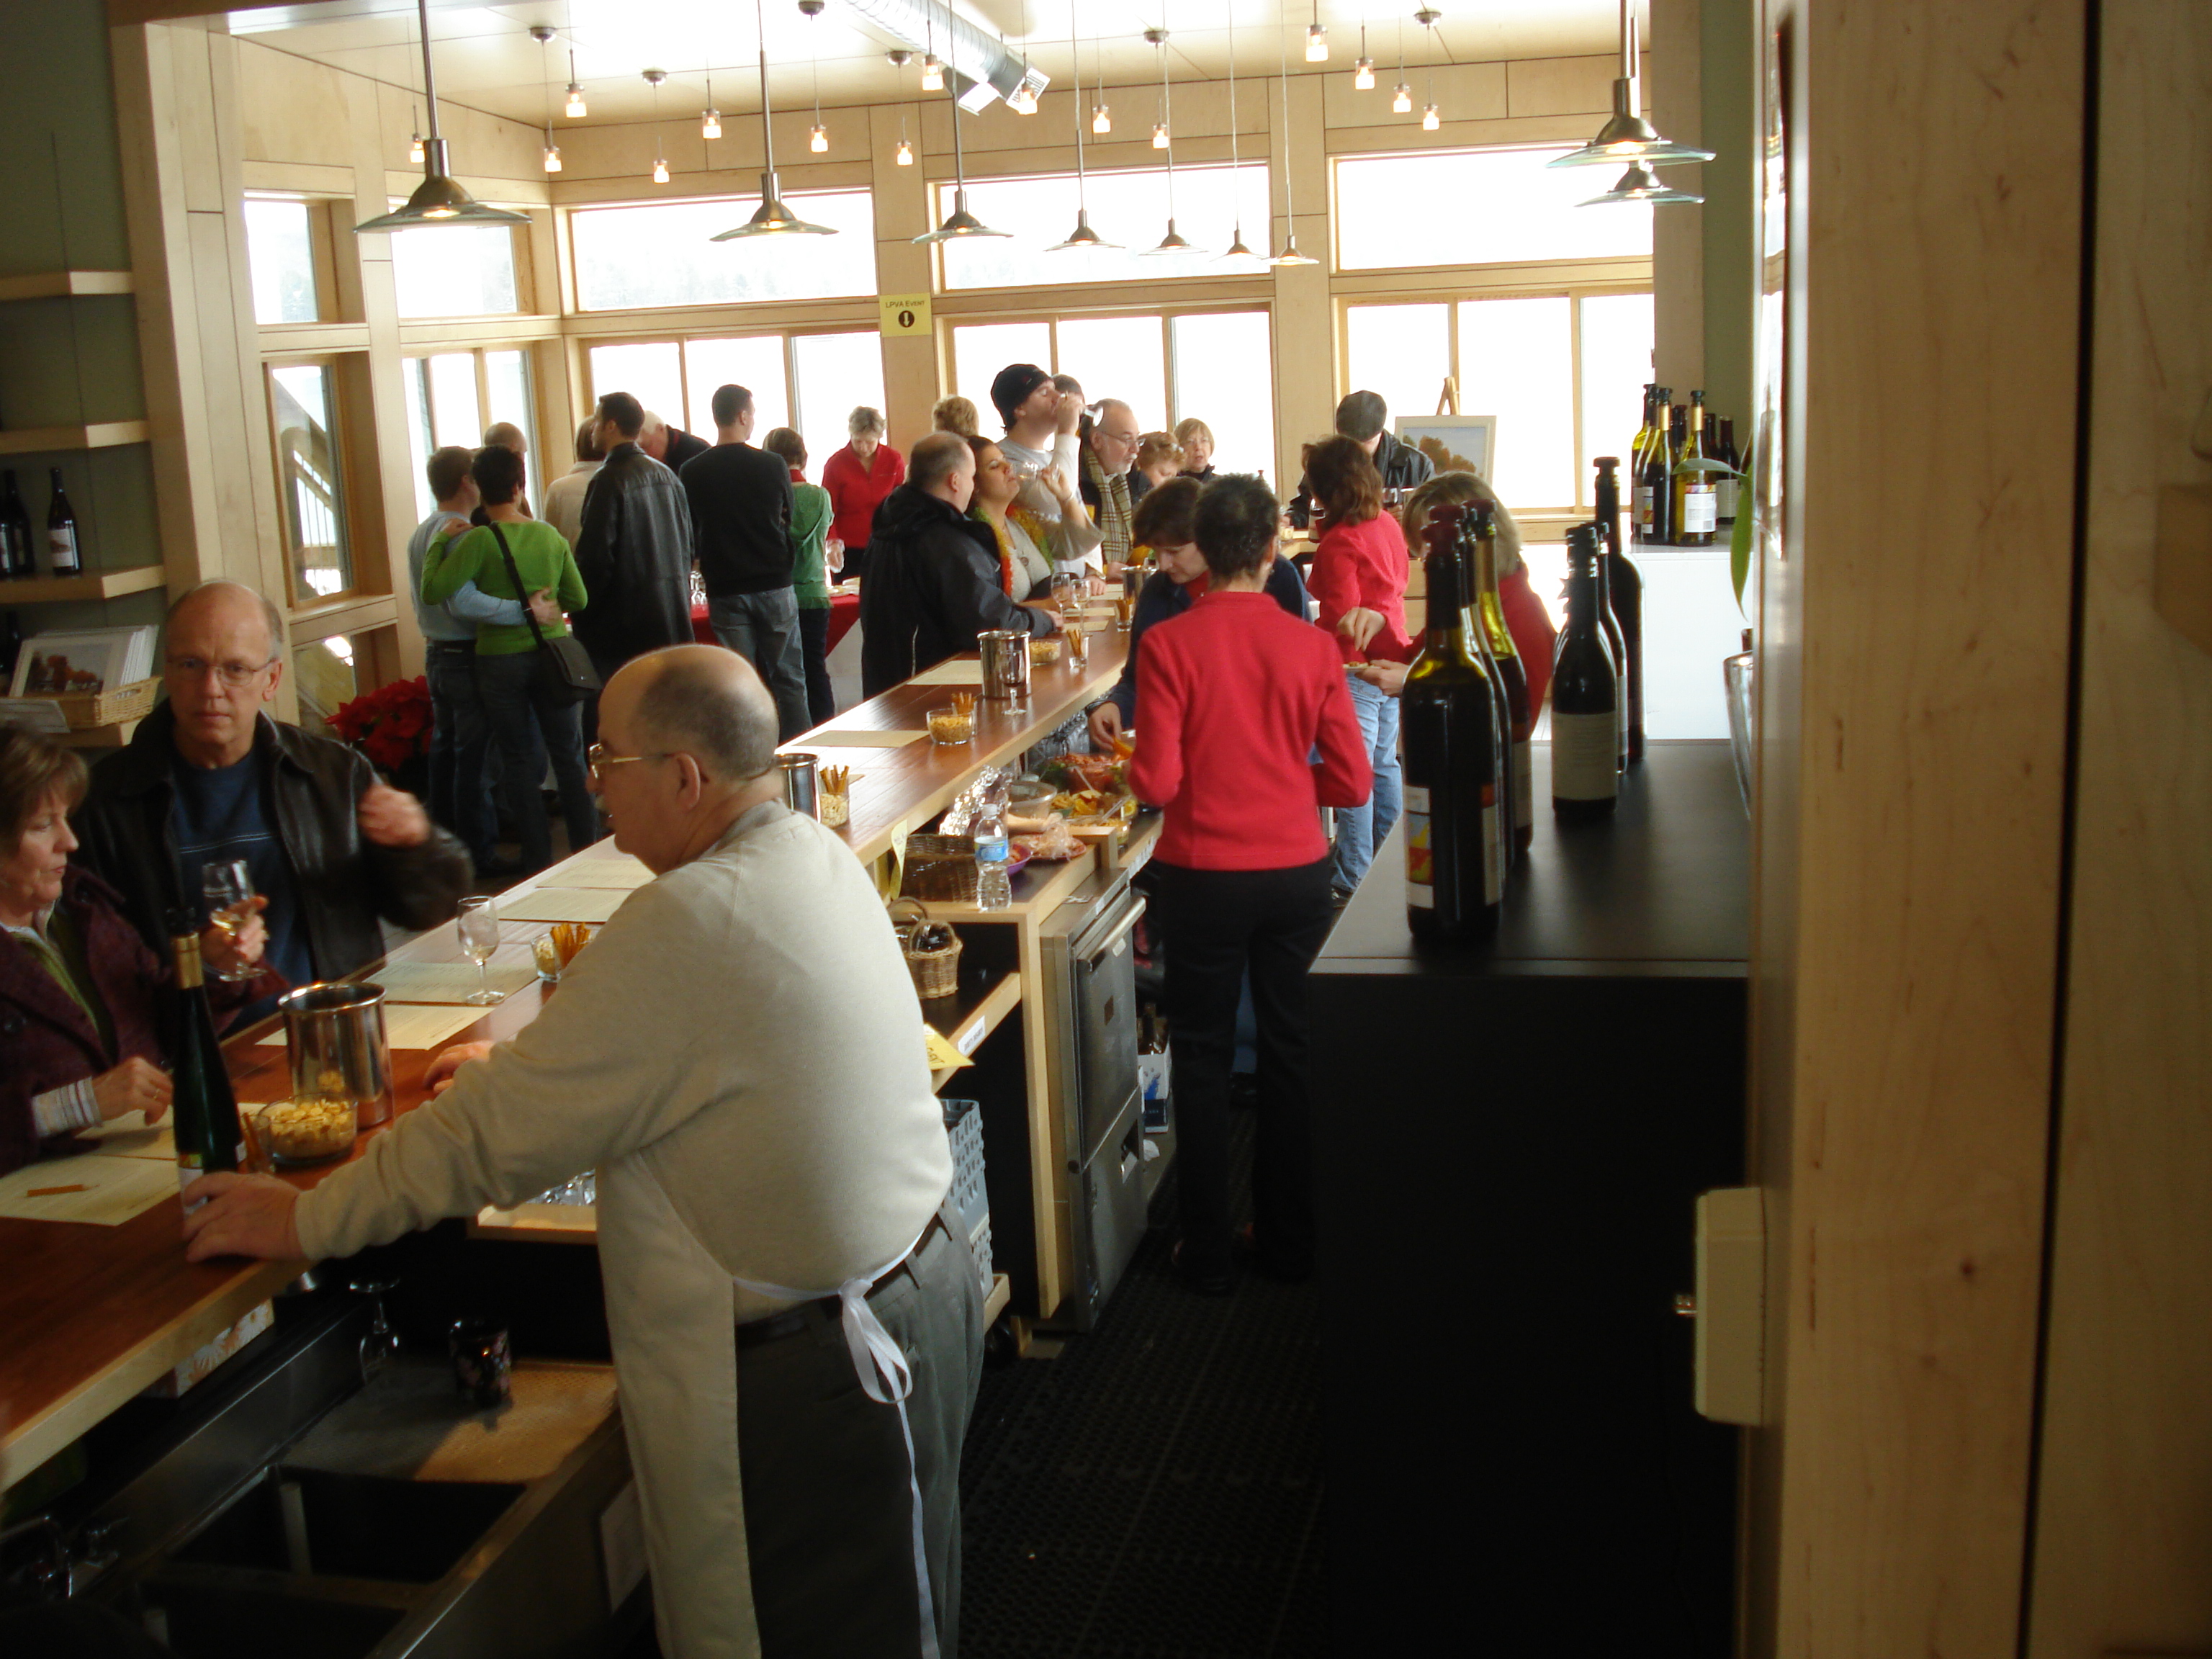
 The last stop we made for the day was at 45 North Winery in Lake Leelanau. I believe this winery is relatively new (less than 10 years old), but they are certainly on their way to becoming an outfit like Black Star Farms. They are in the process of building a tasting room, but for now have things set up on the floor of a bottling building. We tried another 8-10 wines here, but were rushed because of a large crowd and a small bar. In the end we bought three bottles from this winery, but I don't know what they were. It was here that we discovered northern Michigan wineries seem to buy into the idea that corked wine bottles have outlived their usefulness. Everything was a screw top cap. We found that to be very disappointing. I understand the technological argument that says screw caps work as well or better, but it still feels cheap and childish. When we got back in the car we checked out earlier purchases and noticed that all but one or two were also screw tops. Oh well. By the way, 45 North has won awards at some pretty impressive sounding wine competitions, but at the moment they aren't in stores outside of northern Michigan. One of the employees gave me information about how to get in touch with their distributors that have Grand Rapids area connections, but it didn't sound like the type of thing you would go through to get just one bottle or two.
Vacation Recap In Photos


I didn't take a whole lot of photos while we were out. I'm not sure why, but it just didn't occur to me to take photos of anything we saw while we were out wine tasting except for this. This was in Suttons Bay, outside an art gallery. I don't believe this was for sale, but a similarly constructed pig about 1/6th of the size cost $725.
I'll leave the wine tour to a separate post, but it was a really great time. We only hit three of a possible 9-12 wineries in the area, but I am pretty sure they were three of the best. Although I don't know anything about wine, couldn't tell you which are my favorite styles or why and that I get buyer's remorse every time we leave a winery, wine tasting is still one of my favorite things to do.

The remainder of the weekend was spent with this wet rat on the shores of Lake Michigan. Nothing can satisfy her urge to go swimming. She swam so much that at the end of the first day Lauren threw a ball out, Joss went to get and I though I was going to have to swim out and get her before she went under. She was so tired that she fell asleep standing up on the 5 minute car ride from the beach back to the cottage.
But it was a great weekend. We also went strawberry picking on the way up, where I also did not take any pictures. Strawberries seem slightly less delicious after seeing the way that they're grown. I always pictured them hanging high off the ground from a majestic bush, not directly on the ground inside of a plant that looks like a lawn weed.
Northport
 Last weekend I went to weddings on back to back nights. Or at least I tried to. I didn't feel so great after a few hours at the second wedding and went home to take a shower and hug an air conditioner. Last week was so disgustingly hot it ruined everything. I didn't really cook anything because the last thing I wanted was the oven heating the house and I didn't want too much time tending to a 500 degree grill outside in 90 degree heat with 90% humidity. So last week was burgers, cold sandwiches, grilled chicken and pizza.


And just to give you an idea of the scale of this map. That natural triangular loop between Northport, Suttons Bay and Leland takes 20 mins per side to drive. So in an hour's drive time we could hit 6 or 7 wineries no problem. Madonna's family has a winery in that area, I think its the B balloon or in that area on this map.
Pizza Bread? Stromboli?
 I don't know what you call this exactly. My intent was to make pizza bread like my mom makes it, but it really didn't turn out that way. I think it could have, but I made one giant loaf rather than two smaller ones. What she always did when I was younger was make them two at a time, cook one and freeze the other. Hers always fit nicely into a loaf pan, a much more manageable size for freezer storage. Mine did not.
- 1 tablespoon salt
- 1 tablespoon sugar
- 1 (1/4-ounce) packet fresh fast-acting yeast
- 1 1/2 cups warm water, between 100 and 115 degrees F, as measured with a thermometer (any hotter will kill the yeast - an organic leavener; too cool and the yeast won't be activated)
- 4 cups all-purpose flour, plus some extra to knead the dough (I used 2 cups wheat flour and 2 cups all-purpose)
- 1 tbsp olive oil

- 8-10 oz tomato sauce (I used Prego Organic Tomato & Basil because of its smooth, thicker texture)
- 2 cups (1 pkg) Mozzarella cheese
- 1 red bell pepper (diced)
- 1 yellow bell pepper (diced)
- 1 pkg (40?) sliced pepperoni
- 1 tbsp + 1 tsp olive oil
- 1 beaten egg


Moroccan Grilled Salmon
 Earlier this week I saw an episode of Good Eats about salmon and the various ways to prepare it. When it comes to salmon Lauren and I pretty regularly (twice a month on average) make the blackened salmon burgers I've posted here before. I'm not a big fish eater, especially when it comes to fishy fish like salmon, but those salmon burgers are unbelievable.
- 1/2 cup plain yogurt
- Juice of 1 lemon, plus lemon wedges for garnish
- 1 tablespoon extra-virgin olive oil, plus more for the grill
- 2 to 3 cloves garlic, smashed
- 1 1/2 teaspoons ground coriander
- 1 1/2 teaspoons ground cumin
- Kosher salt and freshly ground pepper
- 4 6-ounce skinless center-cut salmon fillets
- 1/4 cup chopped fresh cilantro or parsley, for garnish
Weekends With A Dog
If things slow down a bit on the blog this summer, its because of Lauren's dog Jocelyn. She is relentless in her desire to play outside, and if you don't play often enough Lauren will come home to find shoes, the garbage can, a remote control (whatever she can reach), strewn about her bedroom. So in order to keep that from happening we take her to the dog park or out into the backyard to as often as possible. Then, while we're outside playing we usually fire up the grill and make simple foods and things I've already blogged about. The video above is from Sunday afternoon in the backyard. Lauren shot the video, while I'm off camera to the right throwing the ball.

Beer Can Chicken
 This weekend was pretty busy for me. Friday night Lauren had a going away party for some friends which made for a late night. Then Saturday we helped them move their stuff on to a truck, which is always longer and more tedious than you mentally prepare for. Saturday night we were scheduled to babysit an infant but that got scrapped at the last minute. Not that I'm doubting the story we were told by the parents, but I get the feeling that fate stepped in and said "Ba is not ready for that just yet. Sure it seems like a good idea to him now, but he's not going to know what do after 25 minutes".
- 1 fresh roaster chicken (4-5 lbs)
- 5-6 tsp McCormick Grill Mates Chicken Dry Rub
- Olive Oil
- 1 12 oz can of beer

Curly Fries

- 2 tsp paprika
- 1/4 tsp cayenne
- 1/8 tsp garlic powder
- 1/8 tsp onion powder
Hawaiian Chicken Kebabs

- Lawry's Hawaiian Marinade
- 1.5 lbs boneless skinless chicken breast (chunked)
- 1 large vidalia onion (chunked)
- 1 sweet bell pepper (red/yellow/orange, chunked)
- 1 pineapple (chunked)
- BBQ sauce
Zucchini Bread
 I happened to find some zucchini at Meijer last night, so I made zucchini bread. Last week when I made banana bread, I made two loaves and three mini-loaves. The two big loaves went with me to jury duty, but only one got eaten. So for the whole weekend I had a delicious breakfast/midnight snack ready and waiting. That was the idea behind making the zucchini bread, but I can already tell its not going to last that long.
- 1 1/8 cups white sugar
- 1 1/8 cups brown sugar
- 3 eggs
- 1 cup vegetable oil (or 2 sticks softened butter)
- 1 tablespoon vanilla extract
- 2 cups chopped zucchini
- 1 cup chopped walnuts
- 3 cups all-purpose flour
- 1 teaspoon salt
- 1 teaspoon baking soda
- 1 teaspoon baking powder
- 1 tablespoon ground cinnamon
Banana Bread
 Tomorrow ends my stint in jury duty. It was a short week but strangely enough we members of the jury have bonded in our time together, despite the fact that nobody seems to know anybody else's name. The best way I can describe it is to say that its like an extended field trip in high school.
- 1/2 cup butter, softened
- 1/2 cup white sugar
- 1/2 cup brown sugar
- 2 eggs
- 1 tbsp molasses (rum also works, as does 1 tsp vanilla)
- 1 1/2 cups mashed banana (3-4 bananas)
- 2 cups all-purpose flour
- 1 teaspoon baking soda
- 1/4 tsp salt
- 2 tsp cinnamon
- 1 tsp nutmeg
- 1/4 - 1/2 cup chopped walnuts
Tikki Masala Pork
 This was a play off a dinner we made a few months ago with red curry and pork chops. For that meal we used an Archer Farms meal in a box kit that didn't have near enough rice. For this one we just stuck to the basics:
- 1 pkg thin cut pork chops (as many as you need)
- 1 pkg Tasty Bite Tikki Masala simmer sauce
- 1 tbsp olive oil or butter
- White rice
- Salt
- Pepper
Stir Fry Success (Finally!) & More
.JPG) First off, a quick note: I have jury duty this week, which despite what you might hear from other people, is fascinating stuff. So thats 5-8 hours every day, plus I need to at least tread water at my regular job, which doesn't leave me a whole lot of time to cook or write about cooking. So there is a pretty good chance I'll be making pasta and sandwich staples that you can find on this blog throughout the rest of the week and weekend. Thats too bad.
First off, a quick note: I have jury duty this week, which despite what you might hear from other people, is fascinating stuff. So thats 5-8 hours every day, plus I need to at least tread water at my regular job, which doesn't leave me a whole lot of time to cook or write about cooking. So there is a pretty good chance I'll be making pasta and sandwich staples that you can find on this blog throughout the rest of the week and weekend. Thats too bad.
1/2 cup chopped broccoli
1-2 cups cooked white rice
2 tbsp Cashews
1/2 cup water
1/2 cup soy sauce
2 1/2 Tbsp cornstarch
2 Tbsp sugar
2 tsp white vinegar
1-2 Tbsp white wine or dry sherry
Saute vegetables in separate pan until tender and set aside.
Cook rice, set aside
Mix sauce ingredients, stir, set aside
Add chicken to wok (or saute pan) with a little oil
Add chicken and sauce to clean pan, heat thoroughly. Sauce will thicken.
Add vegetables & stir until sauce is thicker veggies are warmed through

